T-SIM V4.5 Reference
Image pre-distortion
| Back to Tutorial | Previous Example |
Step by step example
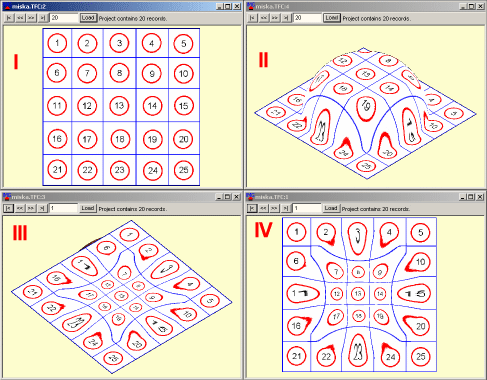
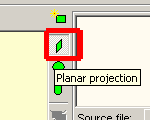
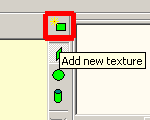
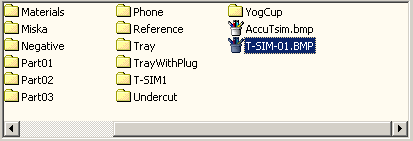
This example shows how image pre-distortion works in T-SIM. Image pre-distortion, as implemented in T-SIM, is easy to understand and use. A flat 2D image (I), represented by BMP or JPG file, is projected (II) from plane onto the surface of the final product (a bowl).Then, just by clicking one button, it is possible to go back in time to the initial stage of the process, where the sheet is flat (III). The final pre-distorted image (IV) is heavily distorted when compared with the original projected image (I).
Step 1 - Preparing project
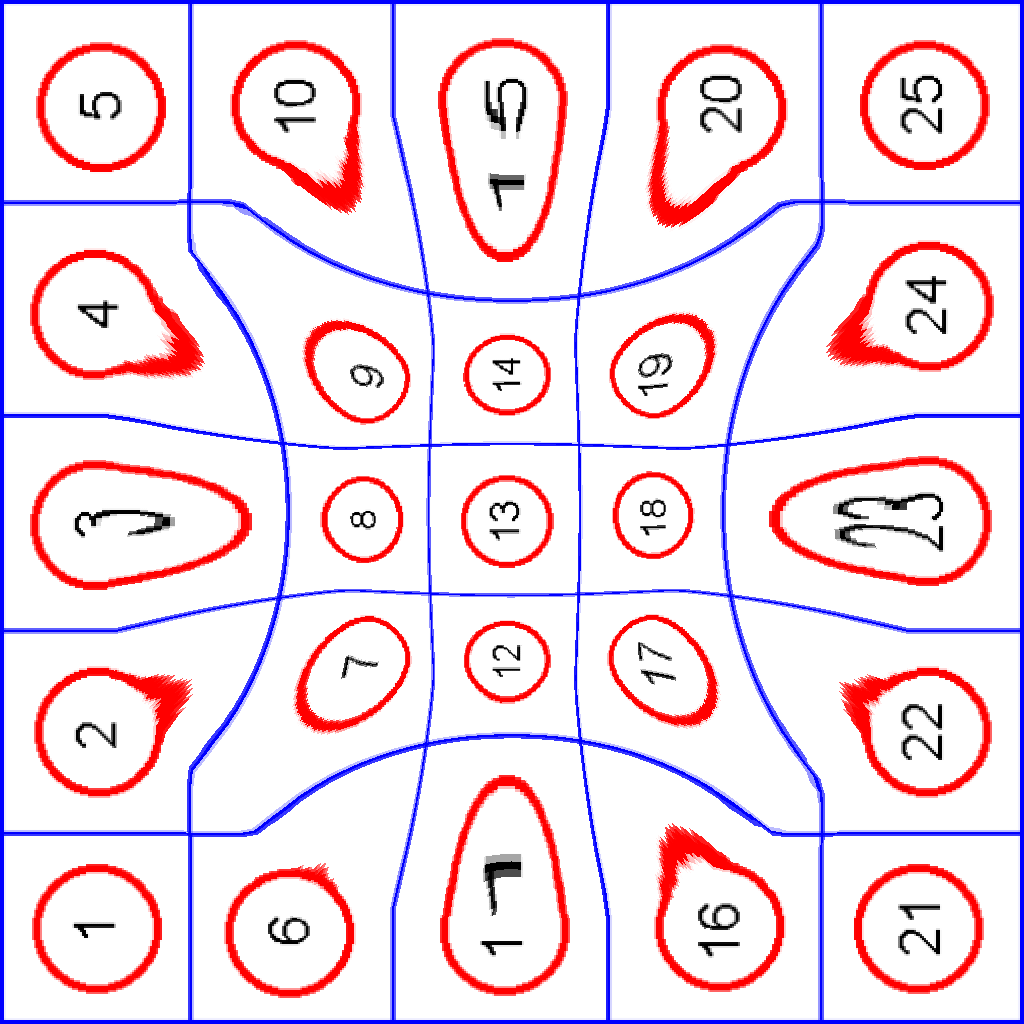
Open for post-processing the example Miska installed in Miska folder. If the example is not solved, solve it. Make sure you have an image (saved as BMP or JPG) already prepared. In this case, rectangular grid with numbers was used. Switch to Image mode (click View / Image mode).
Step 2 - Projecting image
Click Planar projection, then click Add new texture...
... browse for the image file you want to be projected ...
... and click Open.
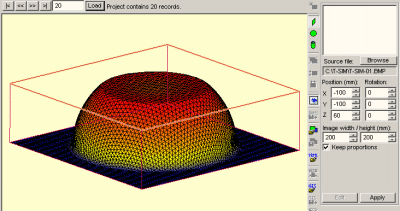
A new box is created around the deformed sheet, one side of the box has yellow edges - this is the location of the image before projection. Now click on Apply button and wait until the image is projected:
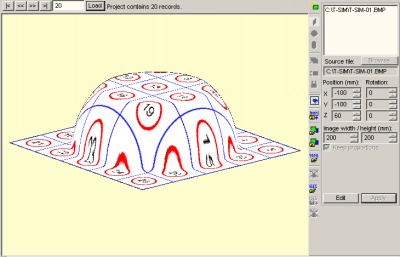
Step 3 - Pre-distorting the image
Now go back to the initial stage of simulation (enter record number 1 and click Load) to see the pre-distorted image:

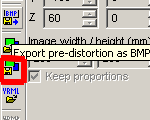
Step 4 - Exporting the pre-distorted image
To export the pre-distorted image, click on Export pre-distortion as BMP.
Enter a new bitmap file name and click Save in the Save dialog. Then specify the resolution of the final image...
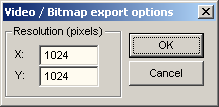
...and click OK. Bitmap file is created and saved. This is the resulting pre-distorted image:
Its quality depends on the initial resolution. However, every projected image can have maximum resolution 1024 * 1024. This means, when a high resolution is required, it is necessary to split the image into separate images with the resolutions up to 1024*1024.
| Back to Tutorial | Previous Example |